You can attach a file to the Workflow Server from the Attachments node of the Workflow Administration Console or with the Referenced Object Manager.
The Referenced Object Manager can be accessed in the following places:
- Attach Electronic Document activity: You can attach electronic documents to the Workflow Server with this activity. To open the Referenced Object Manager, select the activity in the Designer Pane. In the Properties Pane, click the Browse button (ellipsis)
 in the File to Attach property box.
 - Fill Out PDF Form and Retrieve PDF Form Content activities: These activities allow you to attach PDFs to the Workflow Server. To open the Referenced Object Manager, select one of these activities in the Designer Pane. In the Properties Pane, click the Browse button (ellipsis)
 in the Form Content property box.
 - Sign Document activity: You can attach an image file to the Workflow Server with this activity. To open the Referenced Object Manager, select the activity in the Designer Pane. In the Properties Pane, select Add Image and click the Browse button (ellipsis)
 .
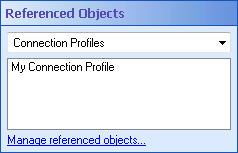
. - If a file has already been attached to the Workflow Server from the current workflow definition, you can attach, modify, or delete all files on the Server from the workflow's Referenced Objects property box. (To view and edit this
 property box, select a blank area in the Designer Pane and click the Advanced button
  at the top of the Properties Pane.) Select Attachments from the drop-down menu, and click the Manage referenced properties link.
Note: When exporting a workflow as a .wfi file, files attached to the workflow definition are included with the workflow definition.
Note: Attachments are saved on the Workflow Server in C:\ProgramData\Laserfiche\WF\ServerData\$. You can configure the root of this path in the Workflow Server File System step of configuring the Workflow Server.
To attach a document to the Workflow Server from an activity or workflow definition
- In the
 Referenced Object Manager, click Add.
 - Browse to the desired file, and click Open.
- Review the file path and name in the Add Attachment dialog box.
- Optional: Type a description of the document in the Description text box.
- Click OK.
- Optional: Click Add to add another attachment, or select an existing file and click Edit to change the file's name, description, and/or path.
- Click Close.
To assign a different attachment to multiple activities in a workflow
Example: The Invoice form has become outdated and needs to be replaced with the Invoice 2012 form. Instead of individually modifying each activity that uses the old Invoice form, you can update all the activities at once with the Reassign option.

